A backpack suspension system is the machinery that connects you to your load: a frame or framesheet for structure, a backpanel against your body, shoulder straps, and a hip belt. Working together, these parts shift the pack's weight off your shoulders and onto your hips, which biomechanics research on hip belts confirms happens during walking. Once you understand that transfer process, you can see why no single design wins outright: close-fitting systems trade ventilation for stability, ventilated systems trade stability for airflow, and frameless packs trade load support for lightness.
Understanding the Core Components of Backpack Suspension
Every suspension system is built from the same basic parts, though manufacturers configure them differently depending on intended use. Osprey's suspension glossary describes the system as the combination of harness, hip belt, backpanel, framesheet, frame, and load lifters, and notes that not every pack has or needs a frame or framesheet. That last point matters more than it sounds: the frame is the heaviest single element of most suspensions, and omitting it is the defining choice of the ultralight category.
The frame is the broad term for an internal or external structure that carries and stabilizes a load, according to Osprey's component definitions. A framesheet is a lighter reinforcement layer that stiffens the backpanel, helps distribute load weight evenly, and can assist in transferring weight downward. Think of the frame as the skeleton and the framesheet as a more flexible cousin that adds structure without the same rigidity.
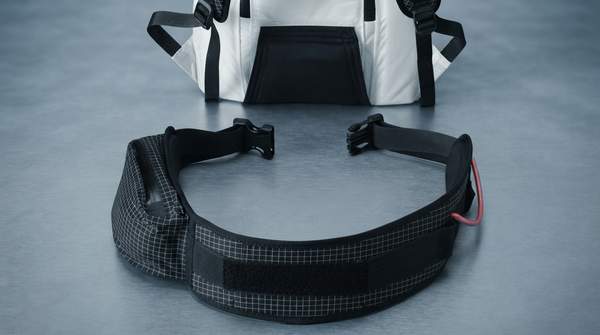
The backpanel is the contact point between the pack and your back. As Osprey explains, whether it sits close to your body or holds the pack away in an airy, separated design determines how pressure is distributed and influences both stability and ventilation. The shoulder harness and hip belt anchor the load to your torso and pelvis. Vanquest, a pack maker, groups the frame, mesh back panel, waist belt, load adjusters, and sternum straps as the parts that anchor you and your pack together, managing weight distribution so you work with your gear rather than against it.
How the System Works: Transferring Load from Shoulders to Hips
The load-transfer process starts with structure. The frame carries and stabilizes the load, connecting the other suspension components so the weight is held as a coherent unit rather than a sagging mass. When a framesheet is present, it reinforces the backpanel and helps distribute load weight evenly, assisting in moving weight downward toward the hips. Without that structure, the pack's shape depends heavily on how well you pack it.
From there, the hip belt does the critical work. A peer-reviewed study of backpack weight and hip belt tension, published in PMC, states that hip belts are known to shift load off the shoulders to the hip during dynamic activities such as walking. The same researchers note an important caveat: it remains unclear to what extent hip belts compensate for the adaptation of movement patterns and load distribution across the trunk, pelvis, and lower limbs. In other words, the load shift is real and well documented, but the full biomechanics of how your body adapts to it are complex and not fully understood.
The shoulder harness and backpanel complete the system. The harness keeps the load positioned and controlled on your torso while the hip belt carries most of the vertical weight, and the backpanel manages how pressure spreads across your back. This is why pack designers describe suspension as the component that connects you to the pack, rather than treating straps and belts as isolated features. Each part only performs its function because the others are doing theirs, and how much load actually reaches your hips depends on the specific design and how tightly you tension the hip belt.
Comparing Backpack Suspension Design Philosophies
The table below categorizes the three main design philosophies and compares them across their primary benefit, the compromise each accepts, and the use case where that trade-off makes sense. The pattern that emerges is consistent: every gain in one dimension comes at a cost in another, whether that cost is ventilation, stability, or the pack's own weight.
| Design Approach | Primary Benefit | Common Trade-off | Best For |
|---|---|---|---|
| Close-to-body / Stability-focused | Maximizes load control and stability, especially during dynamic movements; keeps the pack's center of gravity close to your body | Direct pack-to-back contact limits airflow, often increasing back perspiration | Activities requiring precise load control, such as climbing or scrambling, where minimizing pack sway is critical |
| Ventilated / Airflow-focused | Superior airflow between the pack and your back, often via a tensioned mesh panel that creates a gap, reducing heat buildup | Can slightly reduce stability by holding the load's center of gravity further from your body | Hot-weather hiking and activities where comfort from airflow matters more than absolute stability |
| Frameless / Ultralight | Significantly reduces overall pack weight by omitting the frame entirely | Minimal load support; the pack relies on its contents and your packing skill for shape, and can feel uncomfortable with heavier loads | Light, carefully packed loads where minimizing pack weight is the priority |
The source material behind this comparison reinforces the pattern. Aaron Radcliffe, writing at Nomads Nation, describes these compromises directly: more structure adds weight to the bag itself, more padding can reduce airflow, and mesh systems improve ventilation but may reduce load stability. He also notes that framed backpacks handle weight better and stay stable, while frameless ones are lighter but can lose shape and feel uncomfortable when packed with heavier loads. Osprey's own close-to-body design philosophy, described as built for stability and dynamic movement, exists alongside its ventilated designs precisely because the company treats the balance of flexibility, ventilation, and load support as a use-specific decision rather than a universal answer.
Choosing the Right Suspension System for Your Adventure
When selecting a backpack, prioritize the suspension system design that best matches your intended activity and typical load weight. The decision boundary is straightforward: if you move dynamically on technical terrain, accept the sweat of a close-fitting system. If you hike in heat with moderate loads, accept the small stability cost of a ventilated panel. If your loads are genuinely light, a frameless pack's minimal structure is a feature, not a defect—but the same design becomes a liability the moment you carry heavy, poorly consolidated weight.
The observable signal is the comfort and stability experienced during a test fit with a representative load, specifically noting how weight is distributed between shoulders and hips, and the degree of back ventilation. That test answers the question no specification table can: whether this particular system, with its particular balance of structure, contact, and airflow, moves your real load where you want it.